How do I mount a WISA 500 reservoir?
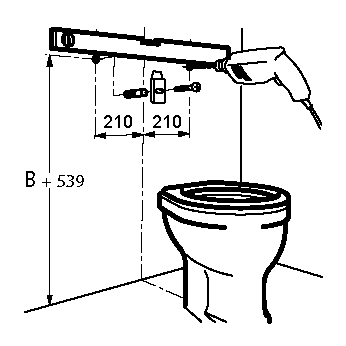
Step 1: Mark
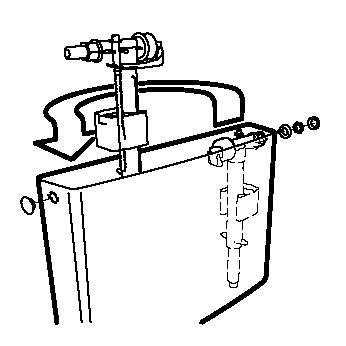
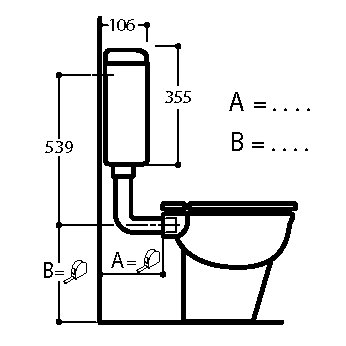
On the lid of the box is a template for drilling the holes and mounting the hanging hooks. Place a vertical mark on the wall directly above the "heart" of the toilet bowl. Use a spirit level and the template to mark the holes in the suspension hooks. The height of the 8 mm plug holes, measured from the center of the toilet bowl entrance, is a maximum of 539 mm and a minimum of 489 mm. Install plugs and hooks and hang the reservoir.
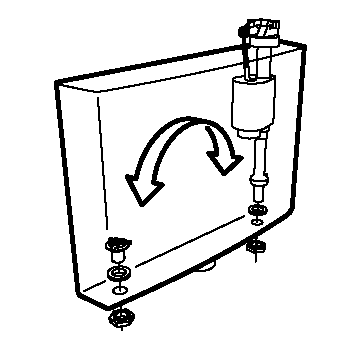
Step 2: Left side connection
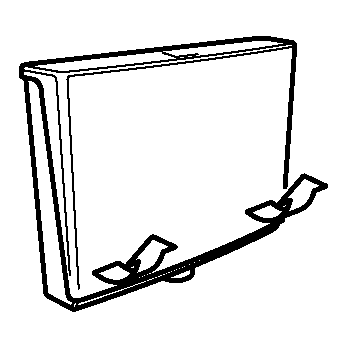
Remove the cover by pulling the tabs of the snap connection (see drawing) forward on the left and right and lifting the cover at the same time. Do not remove or damage the polystyrene foam float valve float, it is necessary for proper operation. The water supply is mounted on the right as standard. Remove the sealing cap. Disassemble the float valve, mount it on the left, adjust it vertically. Place the sealing cap on the right side.
Step 3: Center-back connection
Remove the cover by pulling the tabs of the snap connection (see drawing) forward on the left and right and lifting the cover at the same time. Do not remove or damage the polystyrene foam float valve float, it is necessary for proper operation. A mid-back connection is possible, but you should take into account that the coil interruption is not possible.
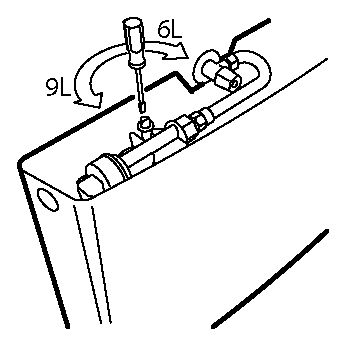
You must order a closed push button from your supplier. In addition, a special angle valve with a mounting pipe and coupling is required. These can be ordered from your supplier. Before mounting the angle valve in the wall plate, first hang the tank. Dismantle the float valve and place it in the bridge piece. When customizing the mounting pipe, remember that it must fall 10 mm into the float valve and the angle valve. When the mounting pipe is in place, the glands can be tightened. Remove the sealing cap from the bridge piece and press it into the opening from which the float valve has been removed.
Step 4: Important
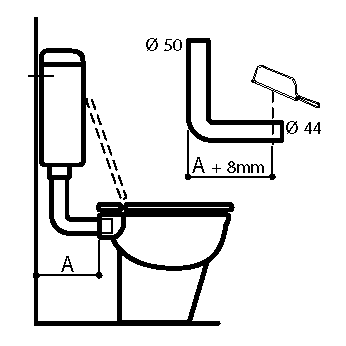
The distance wall-inlet hole toilet bowl A in the drawing. To be able to put the seat and lid upright, a minimum size of 90 mm is required (maximum size 227 mm).
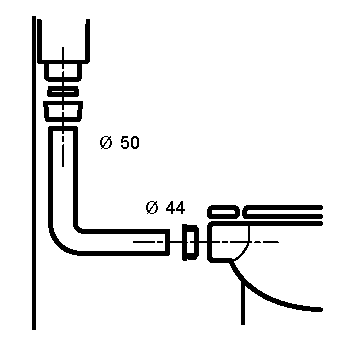
Step 5: Determining the cut-off length of the fall pipe bend
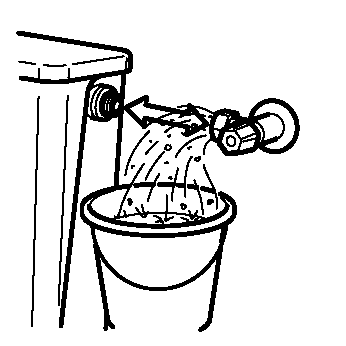
The pipe bend has a length (reservoir side) of 250 mm / ø 50 mm and a length A (toilet bowl side) of 235 mm / ø 44 mm. See drawing. Measure the distance from the wall to the toilet inlet and add 8 mm (downpipe end is pushed 25 mm into the bowl). With this result you know how much to cut off the end. Cut the fall pipe end straight off.
Step 6: Cuff
Slide the rubber sleeve onto part B and connect the down pipe with end A to the reservoir and end B with the down pipe connector in the toilet bowl. Now attach the toilet bowl to the floor.
Step 7: Water savings
Using the flushing interruption does not consume more water than necessary. You can also screw the polystyrene foam float up or down on the float valve. This allows you to adjust the amount of water per flush. This reservoir is set as standard to a capacity of 9 liters. Some toilet bowls already have
a good flush with 6 liters. Try for yourself what is the correct flushing quantity in your situation.
Now place the lid and press it until you hear a click. The lugs on the underside of the lid must engage in the recesses in the reservoir.